Installation
DOOR LOCK: FRONT DOOR LOCK: INSTALLATION
1. INSTALL FRONT DOOR LOCK ASSEMBLY
NOTICE:
* When reusing the removed front door lock assembly, replace the door lock wiring harness seal on the door lock with a new one.
* Do not allow grease or dust to adhere to the surface of the door lock where the seal attaches.
* Reusing the door lock wiring harness seal or using a damaged door lock wiring harness seal may allow water intrusion to the connection, and result in a malfunction in the front door lock assembly.
(a) Install the front door inside locking cable assembly.
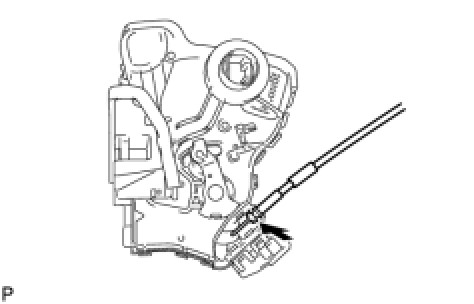
(b) Engage the 3 claws.
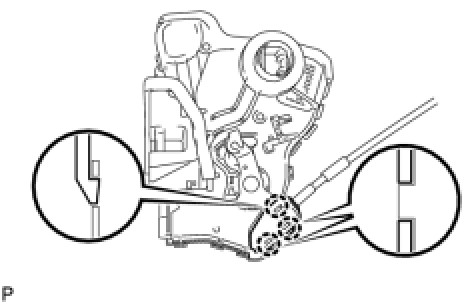
(c) Install the front door lock remote control cable assembly.

(d) Apply MP grease to the sliding parts on the front door lock assembly.
(e) Install a new door lock wiring harness seal to the front door lock assembly.
(f) Insert the front door lock open rod to the front door lock assembly, and set the assembly to the front door outside handle frame.

(g) Make sure that the front door lock open rod is securely connected to the front door lock assembly.
(h) Using a "torx" socket wrench (T30), install the front door lock assembly with the 3 screws.
Torque : 5.0 Nm (51 kgf-cm, 44 in-lbf)
(i) Connect the connector.
2. INSTALL FRONT DOOR OUTSIDE HANDLE COVER Reassembly
3. INSTALL FRONT DOOR REAR LOWER FRAME SUB-ASSEMBLY Reassembly
4. INSTALL FRONT DOOR GLASS SUB-ASSEMBLY Reassembly
5. INSTALL FRONT DOOR SERVICE HOLE COVER Reassembly
6. INSTALL FRONT NO. 1 SPEAKER ASSEMBLY Installation
7. INSTALL FRONT DOOR INNER GLASS WEATHERSTRIP Reassembly
8. INSTALL FRONT DOOR INSIDE HANDLE SUB-ASSEMBLY Reassembly
9. INSTALL FRONT DOOR TRIM BOARD SUB-ASSEMBLY Reassembly
10. INSTALL COURTESY LIGHT ASSEMBLY Reassembly
11. INSTALL ASSIST GRIP COVER Reassembly
12. INSTALL FRONT DOOR INSIDE HANDLE BEZEL PLUG Reassembly
13. INSTALL FRONT DOOR LOWER FRAME BRACKET GARNISH Reassembly