Installation
BRAKE: BRAKE PEDAL: INSTALLATION
1. INSTALL BRAKE PEDAL SUPPORT ASSEMBLY
(a) Temporarily install the brake pedal support assembly with the bolt.

NOTICE:
Fully tighten the bolt after installing the brake booster assembly.
(b) Temporarily install the No. 1 brake pedal support plate with 2 bolts (A) and bolt (B).
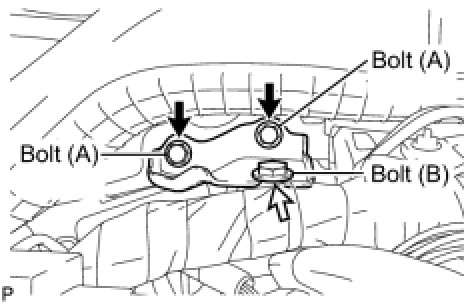
NOTICE:
Fully tighten 2 bolts (A) and bolt (B) after installing the brake booster assembly.
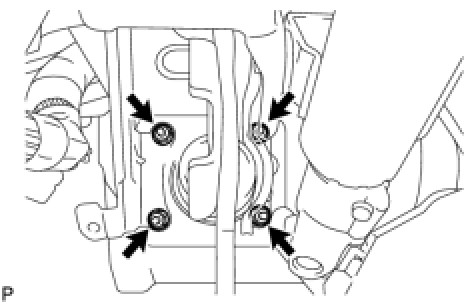
(c) Temporarily install the brake booster assembly and the gasket with the 4 nuts.
(d) Fully tighten the bolt.
Torque : 19 Nm (194 kgf-cm, 14 ft-lbf)
(e) Fully tighten 2 bolts (A) and bolt (B).
Bolt (A) - Torque : 19 Nm (194 kgf-cm, 14 ft-lbf
Bolt (B) - Torque : 13 Nm (133 kgf-cm, 10 ft-lbf
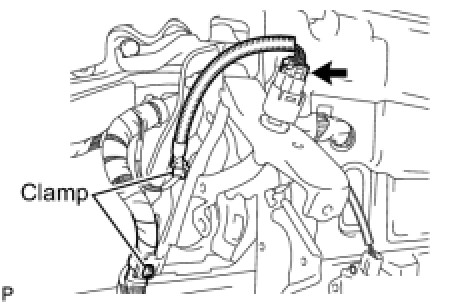
(f) Engage the 2 clamps and connect the stop light switch connector.
2. INSTALL BRAKE BOOSTER ASSEMBLY
HINT
Refer to the procedures up to "INSTALL BRAKE BOOSTER ASSEMBLY". Installation
3. INSTALL COMBINATION METER ASSEMBLY Installation
4. INSTALL INSTRUMENT CLUSTER FINISH PANEL NO.1 Installation
5. INSTALL LOWER INSTRUMENT PANEL FINISH PANEL (w/o Smart Key System) Installation
6. INSTALL LOWER INSTRUMENT PANEL FINISH PANEL (w/ Smart Key System) Installation
7. INSTALL NO. 1 INSTRUMENT PANEL SUB-ASSEMBLY Installation
8. INSTALL LOWER INSTRUMENT PANEL FINISH PANEL LH Installation
9. INSTALL COWL SIDE TRIM SUB-ASSEMBLY LH Installation
10. INSTALL FRONT DOOR SCUFF PLATE LH Installation
11. CONNECT CABLE TO NEGATIVE BATTERY TERMINAL