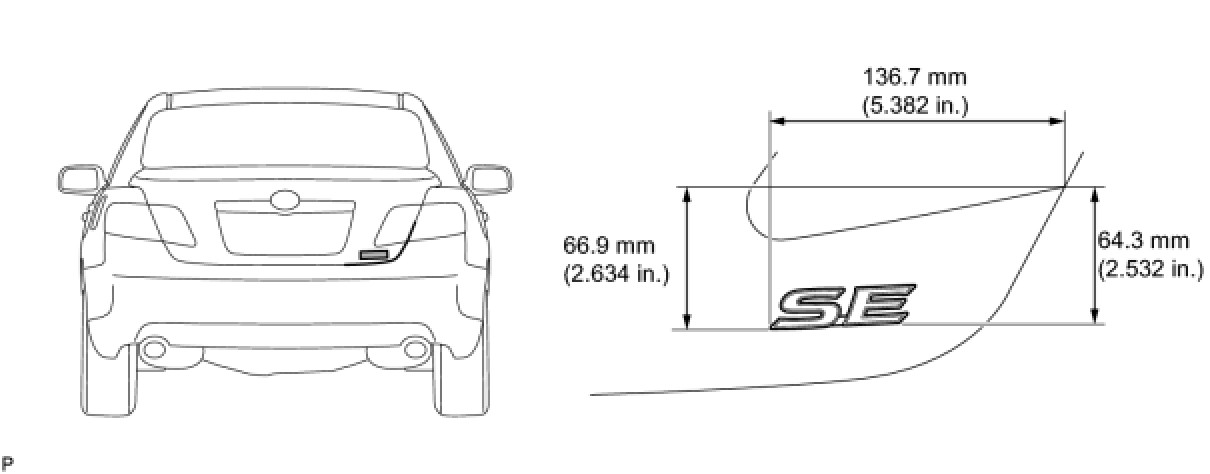
Installation
EXTERIOR: NAME PLATE: INSTALLATION
HINT
When installing the name plate, heat the vehicle body and name plate using a heat light.
Heating temperature:
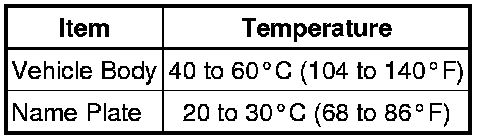
NOTICE:
Do not heat the vehicle body and name plate excessively.
1. INSTALL NO. 2 LUGGAGE COMPARTMENT DOOR NAME PLATE
(a) Clean the vehicle body surface.
(1) Using a heat light, heat the vehicle body surface.
(2) Remove the double-sided tape from the vehicle body.
(3) Wipe off any tape adhesive residue with cleaner.
(b) Clean the name plate. (If reusing the name plate)
(1) Using a heat light, heat the name plate.
(2) Remove the double-sided tape from the name plate.
(3) Wipe off any tape adhesive residue with cleaner.
(4) Apply new double-sided tape to the name plate.
(c) Install the name plate.
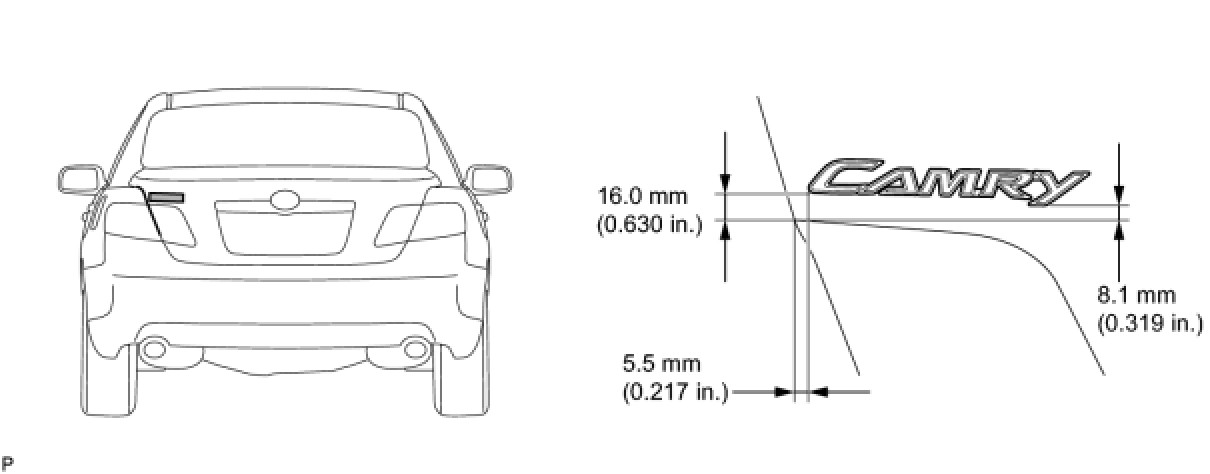
(1) Using a heat light, heat the vehicle body and name plate.
(2) Remove the release paper from the name plate.
HINT
After removing the release paper, keep the exposed adhesive free from foreign matter.
(3) Install the name plate.
2. INSTALL NO. 3 LUGGAGE COMPARTMENT DOOR NAME PLATE
(a) Clean the vehicle body surface.
(1) Using a heat light, heat the vehicle body surface.
(2) Remove the double-sided tape from the vehicle body.
(3) Wipe off any tape adhesive residue with cleaner.
(b) Clean the name plate. (If reusing the name plate)
(1) Using a heat light, heat the name plate.
(2) Remove the double-sided tape from the name plate.
(3) Wipe off any tape adhesive residue with cleaner.
(4) Apply new double-sided tape to the name plate.
(c) Install the name plate.
(1) Using a heat light, heat the vehicle body and name plate.
(2) Remove the release paper from the name plate.
HINT
After removing the release paper, keep the exposed adhesive free from foreign matter.
(3) Install the name plate.
For name plate LE:
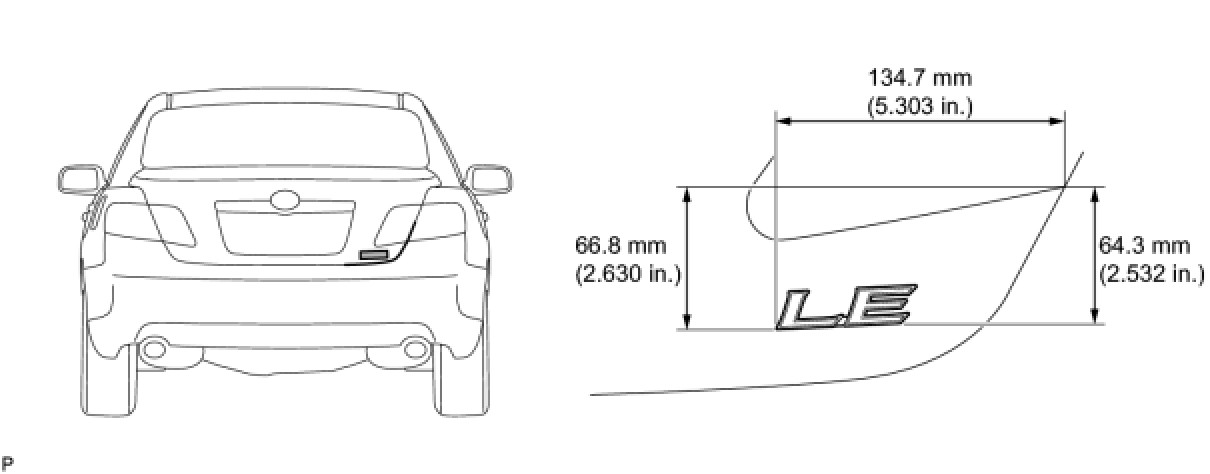
For name plate XLE:
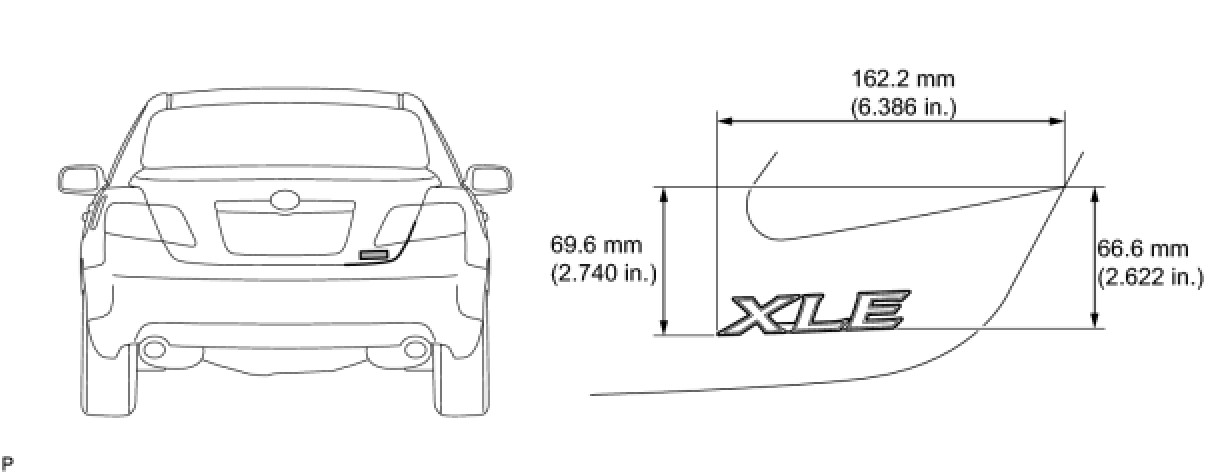
For name plate SE: