Reassembly
SEAT: REAR SEAT ASSEMBLY (for Reclining Seat Type): REASSEMBLY
HINT
A bolt without a torque specification is shown in the standard bolt chart. Standard Bolt - Specified Torque For Standard Bolts
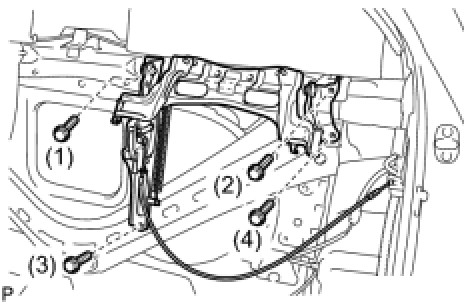
1. INSTALL REAR SEAT RECLINING ADJUSTER ASSEMBLY
(a) Install the rear seat reclining adjuster assembly with the 4 bolts.
Torque : 18 Nm (184 kgf-cm, 13 ft-lbf)
NOTICE:
Tighten the bolts in the order shown in the illustration to install the rear seat reclining adjuster assembly.
2. INSTALL RECLINING REMOTE CONTROL LEVER SUB-ASSEMBLY
(a) Install the rear seat reclining control cable.
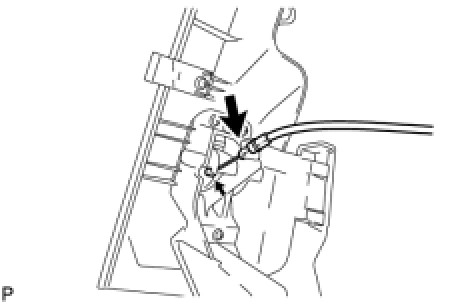
(b) Engage the 2 clips and claw and then install the reclining remote control lever sub-assembly.
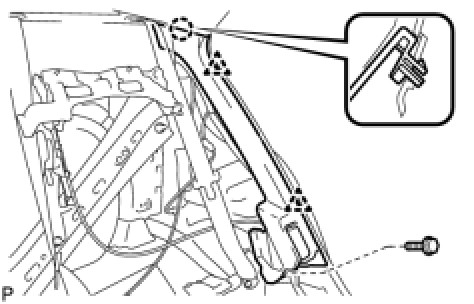
(c) Install the bolt.
Torque : 18 Nm (184 kgf-cm, 13 ft-lbf)
(d) Adjust the control lever to set the rear reclining adjuster assembly to its upper most position.
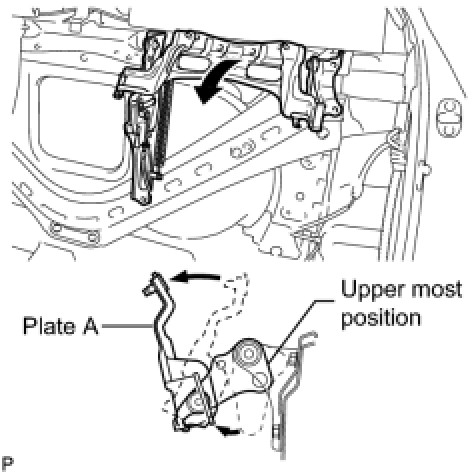
(e) Pull plate A toward the front of the vehicle to lock the plate.
3. INSTALL REAR DOOR OPENING TRIM WEATHERSTRIP LH
4. INSTALL REAR DOOR SCUFF PLATE LH Installation
5. INSTALL REAR SEAT CENTER ARMREST BOX ASSEMBLY
6. INSTALL CENTER SEAT ARMREST PLATE INNER
7. INSTALL CENTER SEAT BACK COVER SUB-ASSEMBLY
(a) Install the center seat back cover sub-assembly with the hook.
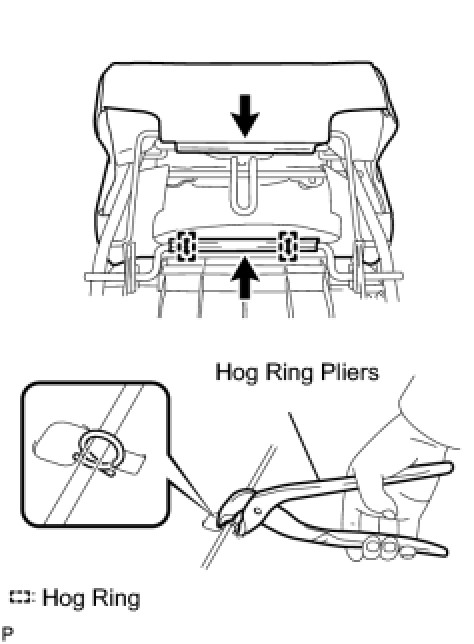
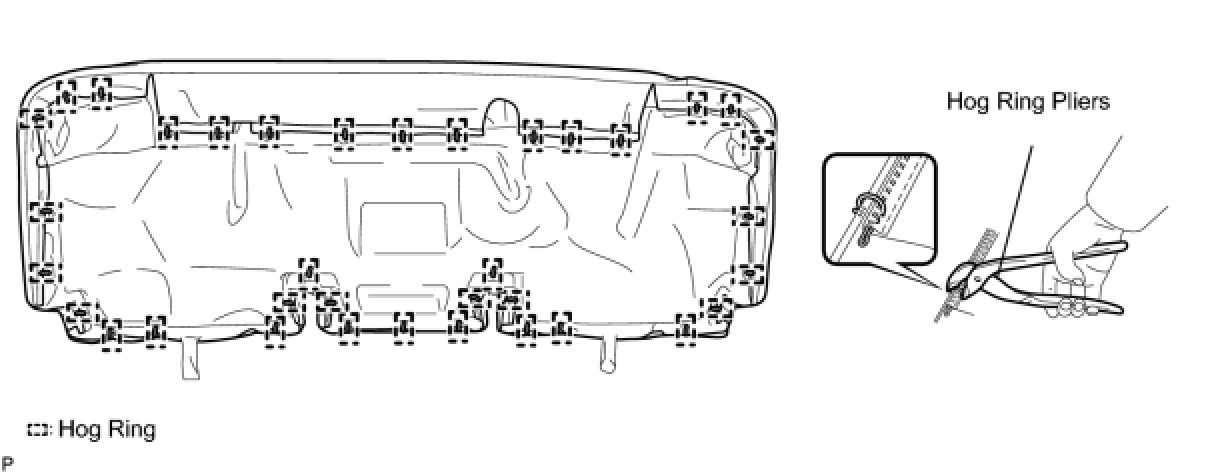
(b) Using hog ring pliers, install 2 new hog rings.
8. INSTALL REAR SEAT HEADREST SUPPORT
9. INSTALL REAR SEAT HEADREST SUPPORT
10. INSTALL REAR CENTER SEAT ARMREST ASSEMBLY
11. INSTALL REAR SEPARATE TYPE SEAT BACK COVER
12. INSTALL REAR SEAT HEADREST SUPPORT (for LH Side)
13. INSTALL REAR SEAT HEADREST SUPPORT (for LH Side)
14. INSTALL REAR BENCH TYPE SEAT CUSHION COVER
(a) Using hog ring pliers, install 16 new hog rings.
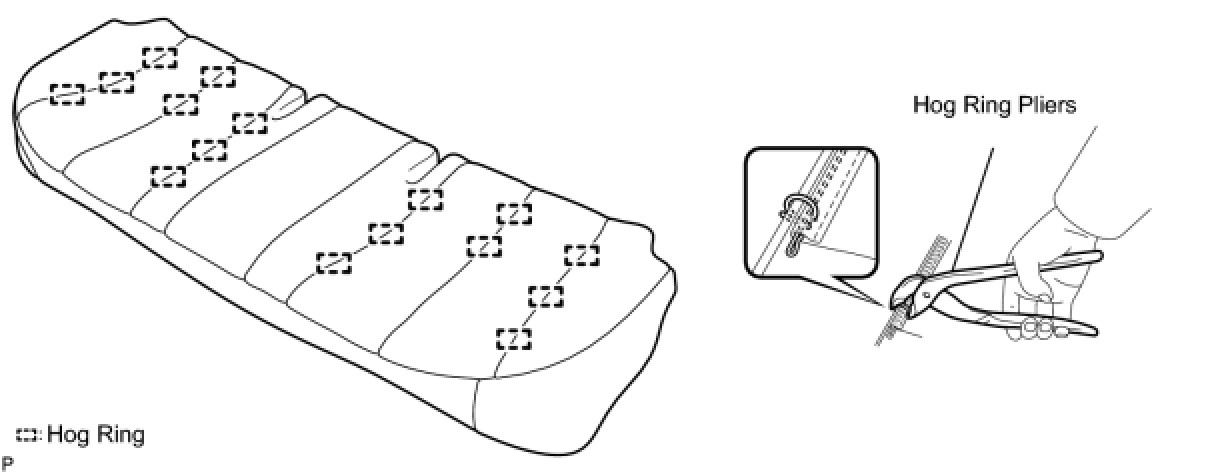
NOTICE:
* Be careful not to damage the cover.
* When installing the hog rings, take care to minimize wrinkles as much as possible.
(b) Using hog ring pliers, install the rear bench type seat cushion cover to the seat cushion pad with 36 new hog rings.