Removal
SLIDING ROOF: SLIDING ROOF HOUSING: REMOVAL
1. REMOVE ROOF HEADLINING ASSEMBLY
(a) Remove the roof headlining assembly Removal.
2. REMOVE FRONT SIDE RAIL SPACER LH
(a) Disengage the 2 claws and remove the front side rail spacer LH.
3. REMOVE FRONT SIDE RAIL SPACER RH
HINT
Use the same procedure for the RH side and LH side.
4. REMOVE CURTAIN SHIELD AIRBAG ASSEMBLY LH Removal
5. REMOVE CURTAIN SHIELD AIRBAG ASSEMBLY RH
HINT
Use the same procedure for the RH side and LH side.
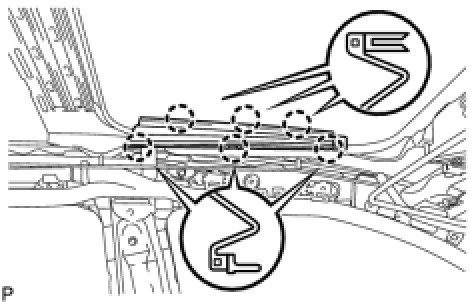
6. REMOVE SLIDING ROOF SIDE GARNISH LH
(a) Disengage the 6 claws and remove the sliding roof side garnish LH.
7. REMOVE SLIDING ROOF SIDE GARNISH RH
HINT
Use the same procedure for the RH side and LH side.
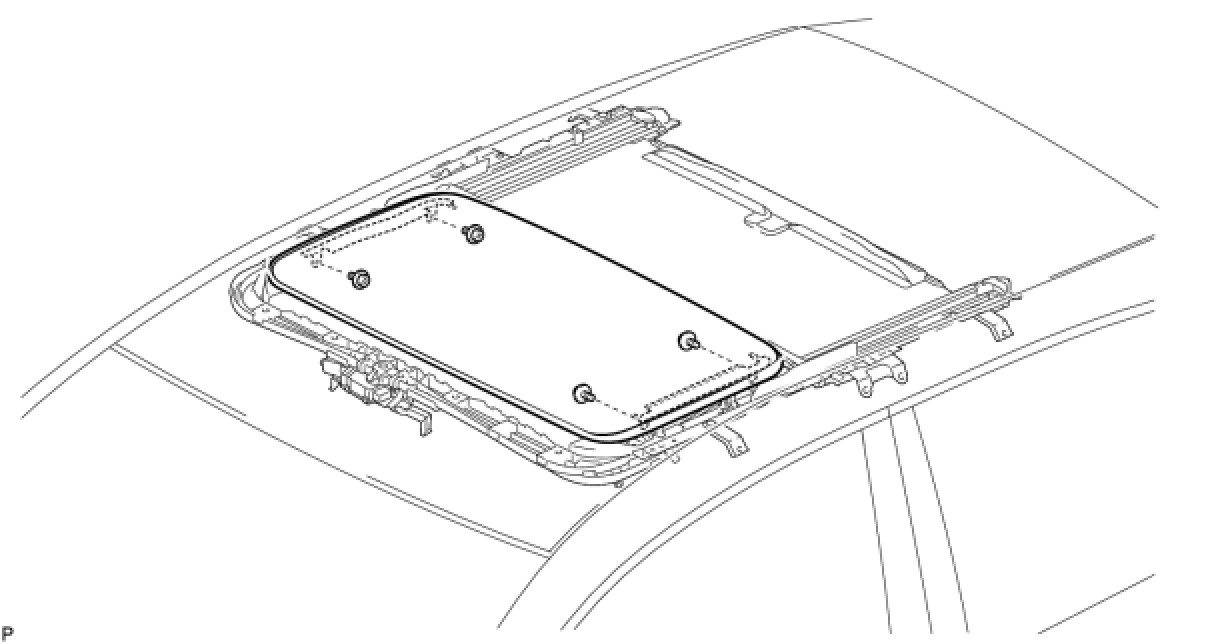
8. REMOVE SLIDING ROOF GLASS SUB-ASSEMBLY
(a) Using a T25 "TORX" socket wrench, remove the 4 screws and sliding roof glass sub-assembly.
NOTICE:
To prevent the sliding roof glass and sliding roof drive gear from being displaced, fully close the sliding roof glass (sliding roof drive cable), and then remove the sliding roof drive gear.
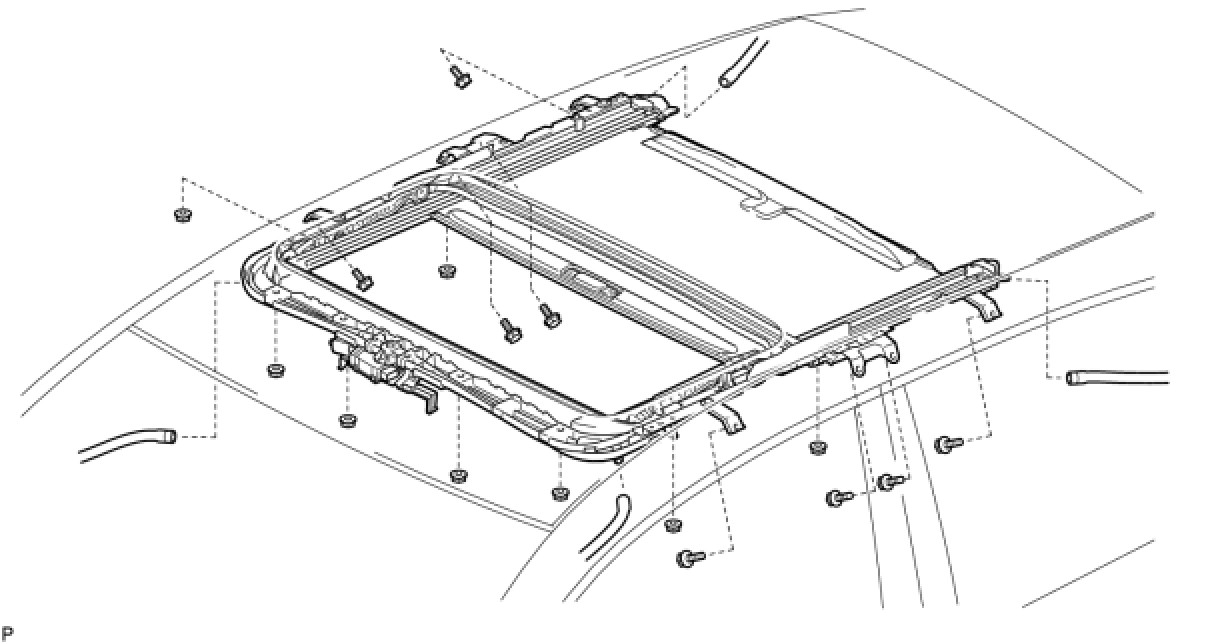
9. REMOVE SLIDING ROOF HOUSING SUB-ASSEMBLY
(a) Disconnect the 4 sliding roof drain hoses.
(b) Remove the 8 bolts, 8 nuts, and sliding roof housing sub-assembly.
10. REMOVE SLIDING ROOF WEATHERSTRIP
(a) Remove the sliding roof weatherstrip from the sliding roof glass sub-assembly.