Removal
SUSPENSION: FRONT STABILIZER BAR: REMOVAL
1. DISCONNECT CABLE FROM NEGATIVE BATTERY TERMINAL
2. PLACE FRONT WHEELS FACING STRAIGHT AHEAD
3. REMOVE FRONT WHEELS
4. SEPARATE STEERING INTERMEDIATE SHAFT ASSEMBLY Removal
5. SEPARATE TIE ROD END SUB-ASSEMBLY Removal
6. REMOVE FRONT STABILIZER LINK ASSEMBLY LH
(a) Remove the 2 nuts and the front stabilizer link assembly LH.

HINT
If the ball joint turns together with the nut, use a hexagon wrench (6 mm) to hold the stud.
7. REMOVE FRONT STABILIZER LINK ASSEMBLY RH
(a) Remove the 2 nuts and the front stabilizer link assembly RH.
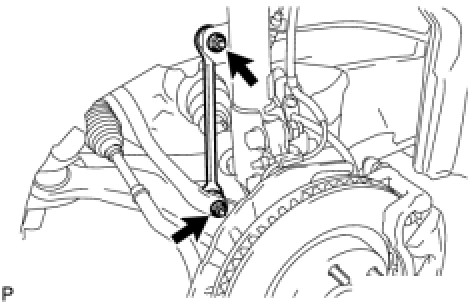
HINT
If the ball joint turns together with the nut, use a hexagon wrench (6 mm) to hold the stud.
8. REMOVE ENGINE ASSEMBLY WITH TRANSAXLE
HINT
Refer to the instructions for removal of the engine assembly Removal for 2AR-FE, Removal for 2GR-FE).
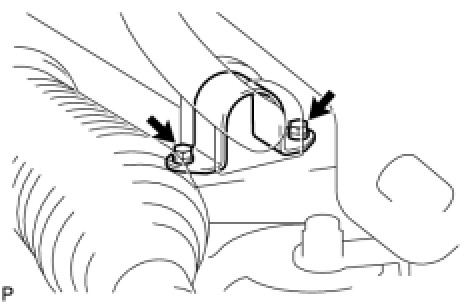
9. REMOVE FRONT NO. 1 STABILIZER BRACKET LH
(a) Remove the 2 bolts and the front No. 1 stabilizer bracket LH from the front frame assembly.
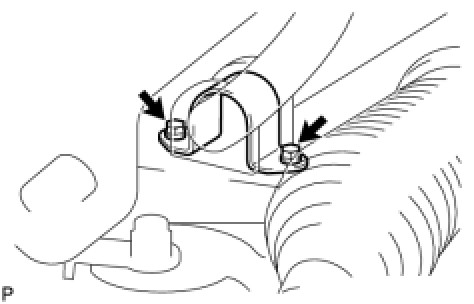
10. REMOVE FRONT NO. 1 STABILIZER BRACKET RH
(a) Remove the 2 bolts and the front No. 1 stabilizer bracket RH from the front frame assembly.
11. REMOVE FRONT NO. 1 STABILIZER BAR BUSHING
(a) Remove the 2 front No. 1 stabilizer bar bushings from the front stabilizer bar.
12. REMOVE FRONT STABILIZER BAR